
Windows Vista Tips: Delete Temporary Files
Filed Under ( Hacks, Technology, Tips, Tutorial, Windows Secret ) by admin on 29-04-2009
Tagged Under : Cleanup, Tips, Vista, Windows
Windows Vista includes a very useful “Disk Cleanup Tool” which does exactly as the name suggests, and allows you to remove a wide variety of temporary and cached files that you no longer need. Most applications will automatically remove the temporary files once you have closed the software down, but in some cases (such as crashes or bad programming), trails can be left behind. Removing these files will create extra diskspace and keep your system in good condition.
To begin, load the Run box by pressing WINDOWS KEY + R, then type “cleanmgr” and click OK:
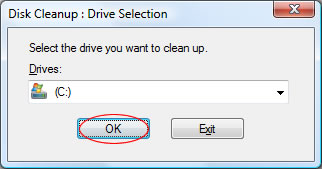
Now, select the drive you wish to clean up. Normally the “C:” is your primary drive where temporary files will be located. Click OK once you have done this:
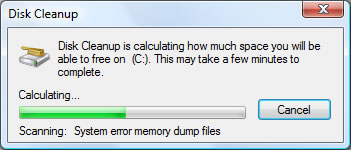
It may take a few moments while the cleanup software scans your drive for files that are safe to remove:
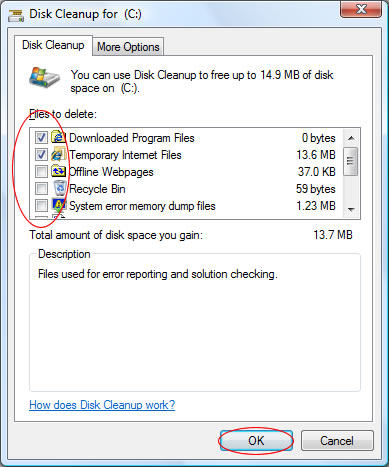
You can then select all of the temporary file types you wish to remove. It is not normally worth removing Image Thumbnail files as these will just be recreated next time you view a photo directory. Once you have selected the file types you want to remove, click OK:
You will be prompted to confirm you are sure about the deletion. If you are sure, click Delete Files:

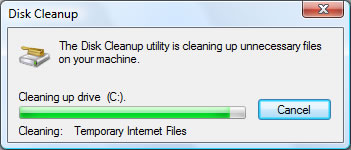
The Disk Cleanup Tool will then remove the selected files and close, successfully reclaiming some diskspace:
Related posts:
[...] Windows Vista Tips: Delete Temporary Files Posted on 29 April, 2009 by rakibulislam Windows Vista Tips: Delete Temporary Files [...]